

This article serves as a reference for all things to check before buying a used MacBook.
Buying a Used Macbook
Obviously this guide helps IF you are buying the MacBook PHYSICALLY, and not online. I wouldn’t even advice you to buy a MacBook online especially used models. So let’s continue.
1. Identify the model, specs & configuration
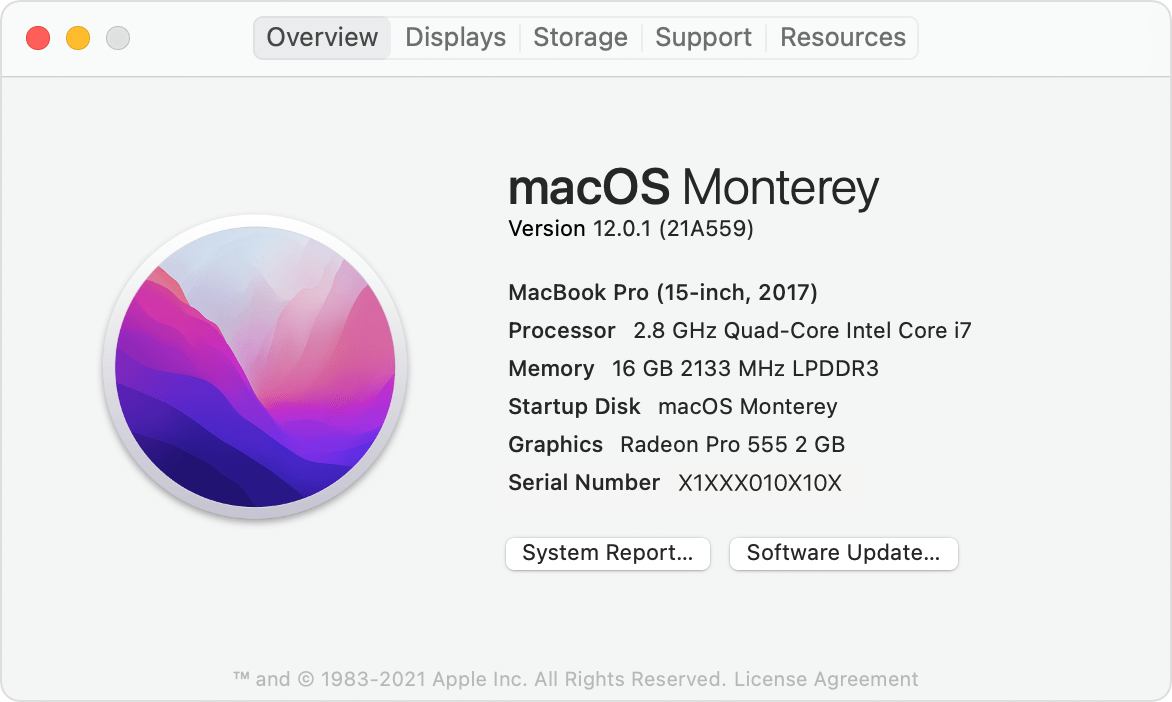
Before buying a used MacBook, be sure to know what you’re buying. Use everymac to lookup specs and model configurations. If you get the serial number, check its authenticity and warranty coverage with Apple here.
The model name, serial number, and other details are in About This Mac and System Information.
Find out how to check the model here.
If your serial number has issues or appears stolen, DO NOT BUY.
2. Visually inspect for physical damages
Buying a used MacBook comes with its own challenges, one of it being the physical condition of the device. You will need to check your potential MacBook from all sides. Look for scratches and dents and missing screws. Over examine the screen.
If it’s a 2012-15 MacBook Pro, look for stains on the screen. Check the display panel hinges – they shouldn’t be too loose; the lid shouldn’t casually fall off on its own. You don’t want a problem on your hand down the line.
3. Check the age of the MacBook
The older a MacBook is, the harder you can negotiate on price. However, consider the flip side too: Older models -> More miles on it -> More wear & tear -> Shorter life expectancy.
Copy the serial number from there and use this link.
4. Remove iCloud account from the MacBook
It is imperative that there is no iCloud lock when buying a used MacBook.
To sign out of iCloud account on the MacBook, ask the seller to do the following steps: Click on the Apple icon () in the menu bar -> System Preferences -> Click “Apple ID” -> Click Overview in the sidebar -> Click Sign Out.
Signing out of the iCloud turns off all iCloud features on the Mac. Including the activation lock that is enabled by Find My app on the MacBook. This is most critical.
5. Check firmware lock
If a MacBook has a firmware lock, it doesn’t allow you to change/upgrade the SSD or boot from an external disk.
Shut down the Mac and restart it – just as it powers on (you’ll hear the startup chime), press and hold the option (⌥) key. If you’re prompted for a firmware password, there’s the lock! Ask the owner to turn it off and repeat the above check.
6. Avoid models with known design flaws
As awesome as they are, a lot of MacBook models tend to have some or the other flaw and when buying a used MacBook, one may not be too aware of these flaws.
For e.g. MacBook Pro 2016-17 models were notorious for keyboard issues due to the notorious butterfly keyboard design. As a someone buying a used MacBook, being informed about the known defects of the model you’re buying would help. And if possible, test the device specifically for that defect.
Few examples of model-specific defects:
- Battery Issue in MacBook Pro 15 inch 2015
- Keyboard Issues in MacBook Pro 2016-17
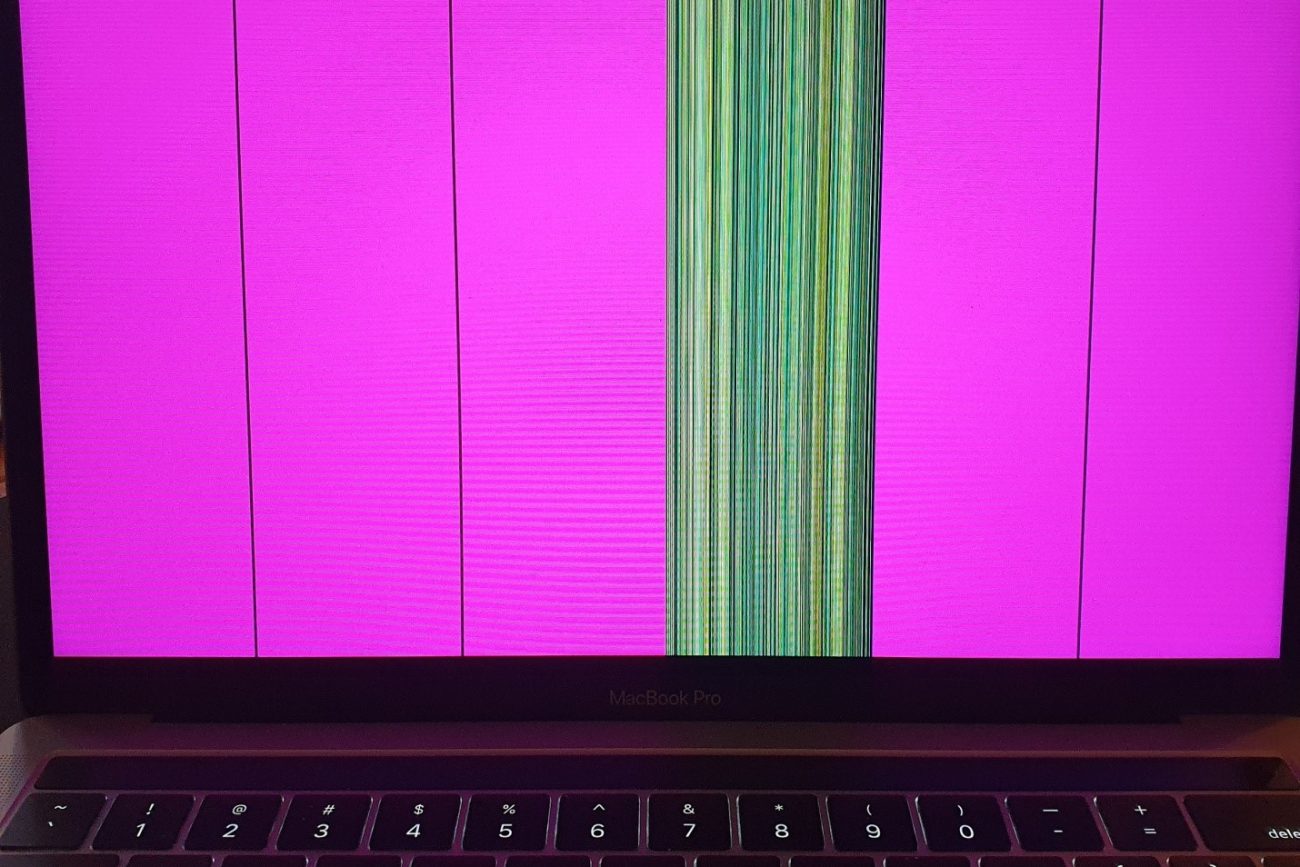
- Display Issues in MacBook Pro Touchbar models
- Staingate Issue in MacBook Pro 2013-14
7. Check the charger!
MacBook chargers, especially the older “Magsafe 2” adapters are quite vulnerable to wear and tear. Check the cable (connecting the adapter brick to the MacBook charging port) – the outer rubber tends to tear off. Spoiler alert: You’ll still have to buy a new charger though. It’s a given with used MacBooks.
8. Check the Battery
Just like the charger above, when buying a used MacBook, the battery is actually the most important. I dare say it should be a deal breaker if the battery on the potential MacBook you’re buying doesn’t have less than 1000 cycles.
When you use a Mac notebook, its battery goes through charge cycles. A charge cycle happens when you use all of the battery’s power—but that doesn’t necessarily mean in a single charge.
For example, you could use half of your notebook’s charge in one day, and then recharge it fully. If you did the same thing the next day, it would count as one charge cycle, not two. In this example, it might take several days to complete a cycle.
Follow these steps to access information about your Mac notebook battery, including its cycle count:
- Hold the Option key and click the Apple menu , then choose System Information.
- Under the Hardware section of the System Information window, select Power. The current cycle count is listed under the Battery Information section.
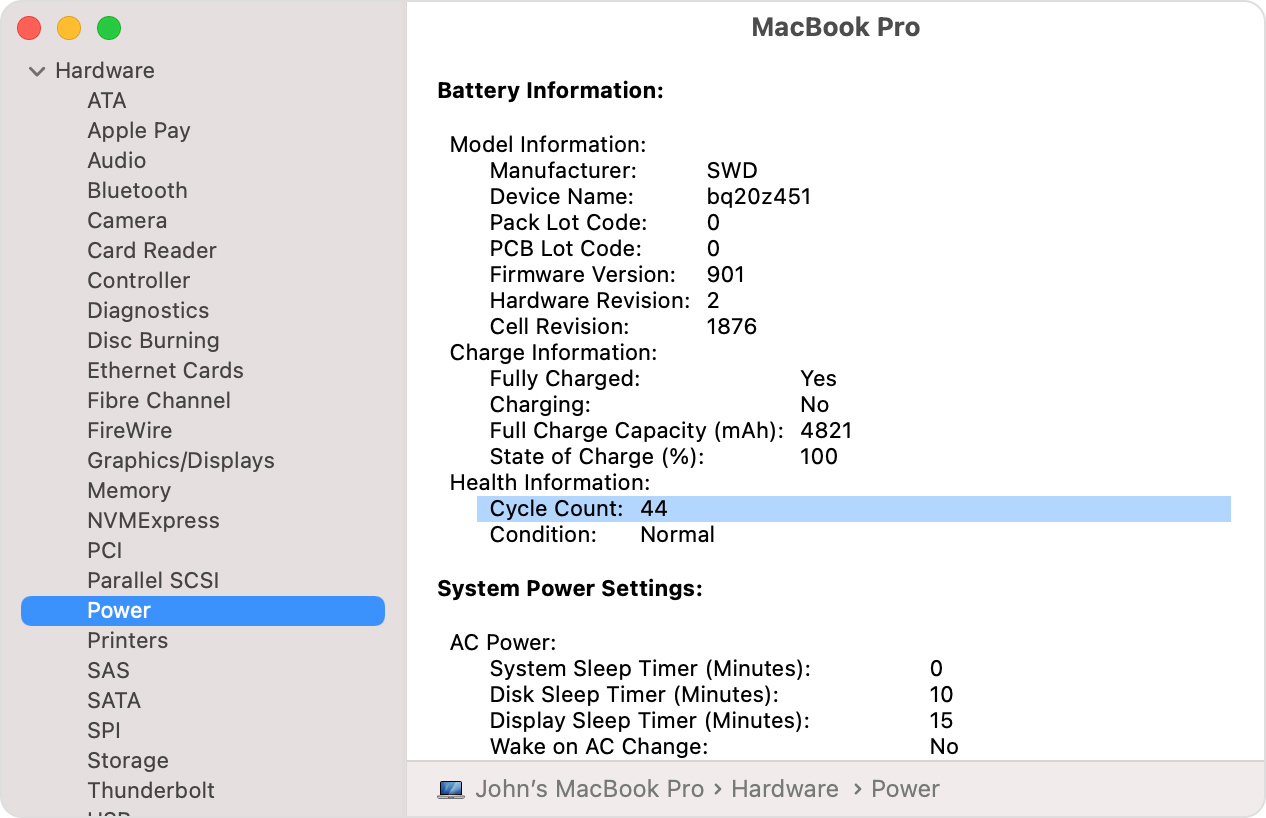
Read more about battery cycles here.
9. Test all hardware functions
Test the speakers, bluetooth, wifi, keyboard, trackpad, camera. Check the battery, check all ports and keep your fingers crossed.
Hope this helps.
Zee.